

Blog
What Are the 10 Best Lifting Gear Buying Tips?
Choosing the right lifting gear is not a simple matter of comparing prices online. A chain sling that looks suitable may fail when used with the wrong load angle, edge condition, or lifting point. I have seen purchasing decisions change after one careful measurement revealed an unexpected load shift. Small details matter.
This guide explores 10 practical lifting gear buying tips for safer, more controlled decisions. It considers working load limits, material quality, manufacturer documentation, inspection history, and compatibility with cranes or hoists. Reliable suppliers should provide clear specifications, traceable identification, and useful guidance from trained staff. Product markings should remain readable, even after repeated handling in dusty workshops.
Think beyond the catalogue photograph. Ask how the equipment will be stored, transported, inspected, and replaced. A lower purchase price may become expensive when downtime, damaged loads, or frequent replacements appear. That said, even experienced buyers can overlook a basic issue. I have done it myself.
The best choice depends on the workplace, load shape, lifting frequency, environmental exposure, and operator experience. No single product fits every task. This article uses practical reasoning and established safety principles to help readers compare lifting gear with greater confidence. It does not replace site-specific risk assessments, competent inspection, or manufacturer instructions. Before buying, pause and check the complete lifting system, not only the item shown in the quotation.
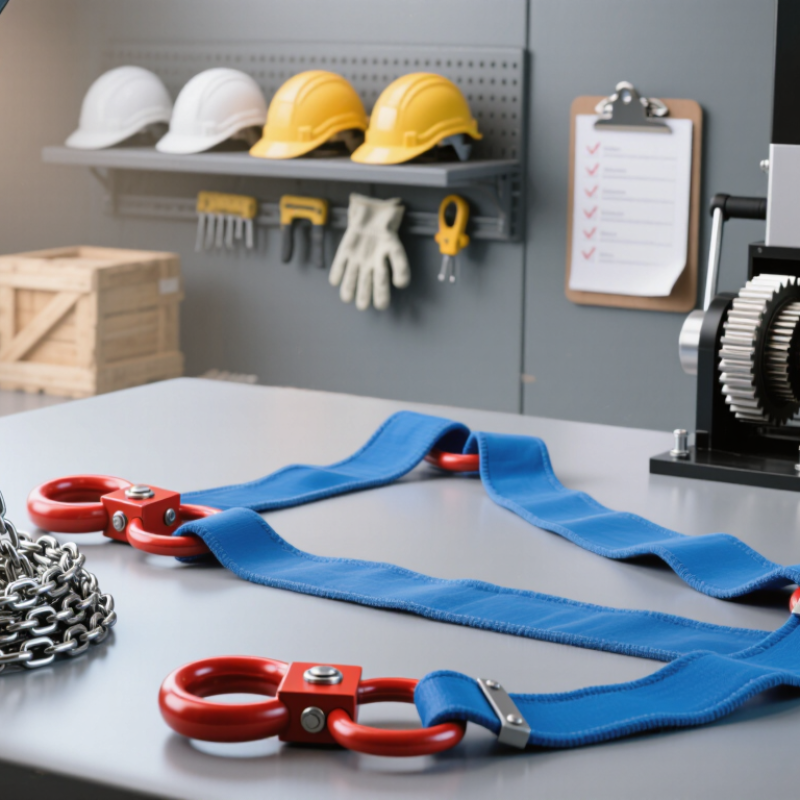
Define the Lifting Task, Load, and Work Environment
What Are the 10 Best Lifting Gear Buying Tips?
Define the lifting task before comparing lifting gear. Identify the load’s weight, dimensions, center of gravity, and lifting points. A compact steel frame may weigh more than it looks. Record the maximum load, not the average load. Include possible shock loading during starting, stopping, or repositioning. Select equipment with a clearly stated working load limit and suitable safety factors.
Tip: Draw the lifting path.
Mark the starting point, travel route, and final position. Check overhead clearance, nearby structures, floor strength, and access for operators. In a narrow workshop, a chain hoist may need different controls than equipment used outdoors. Wet, dusty, salty, or hot environments can damage materials and reduce inspection intervals. Ask a qualified lifting professional to verify the selection against applicable instructions and site requirements.
Tip: Inspect the details.
Look for readable markings, intact hooks, secure latches, and undamaged chains, wire rope, or webbing. Avoid gear that feels “almost suitable.” That judgment is risky. I have seen teams focus on capacity while overlooking load shape and sling angles. Small angle changes can increase tension significantly. Recheck the plan when the load, weather, workspace, or lifting method changes. A short trial lift, with people kept clear, can reveal balance problems before the full movement.
What Are the 10 Best Lifting Gear Buying Tips?
Define the lifting task, load, and work environment before comparing products. Confirm the working load limit, lifting configuration, load angle, centre of gravity, edge conditions, temperature, chemicals, abrasion risk, inspection status, and required certification.
This chart compares minimum design factors specified by OSHA for common sling types. A design factor is not the working load limit: the permitted capacity also depends on sling size, hitch type, angle, configuration, and condition.
Source: OSHA, 29 CFR 1910.184, Slings: official regulation.
Verify Rated Capacity, Safety Factors, and Equipment Standards
What Are the 10 Best Lifting Gear Buying Tips?
Buying lifting gear starts with the load, not the catalogue photograph. Record the actual mass, centre of gravity, lifting points, angle, and possible shock loading. Verify the working load limit on the identification tag, not only the supplier’s webpage. Never confuse breaking load with rated capacity. Check the manufacturer’s stated safety factor and the applicable equipment standard. Depending on your region, this may include ASME B30.9, ASME B30.26, EN 1492, or EN 13414. Standards are not automatically interchangeable. Request certificates, traceability records, inspection dates, temperature limits, and chemical compatibility. Confirm that hooks, shackles, slings, and lifting beams work together.
The ILO estimated 2.93 million work-related deaths worldwide in its 2023 report. Most were not caused by lifting gear, but the figure reinforces the cost of weak controls. The U.S. Bureau of Labor Statistics recorded 5,283 fatal work injuries in 2023. Ask whether the selected gear truly reduces exposure, rather than merely satisfying paperwork. Confirm capacity at the planned sling angle; lower angles can increase tension sharply. Use edge protection on webbing slings. Reject equipment with missing tags, cuts, stretched links, bent fittings, or heat damage. It sounds obvious. It is often missed. A checklist can still mislead when workers ignore site conditions, and that is an uncomfortable lesson worth reviewing before every purchase.
What Are the 10 Best Lifting Gear Buying Tips? - Verify Rated Capacity, Safety Factors, and Equipment Standards
| No. | Buying Tip | What to Verify | Practical Check | Safety Reason | Red Flag |
|---|---|---|---|---|---|
| 1 | Confirm the rated capacity | Check the marked Working Load Limit (WLL) or rated load, including the unit of measurement and lifting configuration. | Compare the equipment rating with the total lifted load, including attachments and any known dynamic effects. | A load must not exceed the lowest-rated component in the complete lifting system. | Capacity is stated only in marketing language, or the rating plate is missing or unreadable. |
| 2 | Understand safety factors | Ask how the product’s design factor or safety factor was established and ensure it is not confused with the permitted working load. | Request technical documentation that identifies minimum breaking force, WLL, test requirements, and applicable assumptions. | A safety factor is not extra usable capacity; it provides a margin between working load and failure load. | The seller suggests using the breaking load as the normal operating load. |
| 3 | Check applicable standards | Identify the relevant national or international requirements for the equipment type, workplace, and intended application. | Review references to recognized lifting standards, such as applicable ASME, EN, ISO, or workplace-regulatory requirements. | Standards define requirements for design, marking, inspection, testing, use, and maintenance. | A generic “CE,” “tested,” or “industrial grade” claim is provided without a standard or declaration. |
| 4 | Verify identification and traceability | Look for a permanent identification tag, serial or batch number, manufacturer information, WLL, size, and material or grade where relevant. | Ensure the markings match the certificate, inspection record, and purchase specification. | Traceability supports safe inspection, recalls, maintenance, and investigation of defects. | Only a removable sticker is supplied, or the product cannot be linked to its records. |
| 5 | Evaluate the lifting configuration | Confirm capacity changes for vertical, basket, choker, multi-leg, or angled lifting arrangements. | Use the supplier’s configuration-specific capacity chart and account for sling angles, load distribution, and edge contact. | Angled and unequal loading can increase leg tension and reduce effective capacity. | One capacity value is shown for every configuration without conditions or angle limits. |
| 6 | Match materials to the environment | Check resistance to chemicals, moisture, corrosion, heat, ultraviolet exposure, abrasion, and electrical hazards. | Compare the equipment material and protective finish with the actual workplace conditions and cleaning agents. | Environmental degradation may reduce strength without obvious external warning. | The product has no temperature range, chemical compatibility information, or use limitations. |
| 7 | Inspect hooks, fittings, and connections | Assess hook type, latch function, shackle dimensions, pin security, connection compatibility, and rated capacity. | Confirm that connectors are correctly sized and cannot be side-loaded, point-loaded, or forced together. | Incompatible or misaligned fittings can create concentrated loads and unexpected release points. | The connection depends on improvised bolts, unapproved welding, or a latch that does not close fully. |
| 8 | Review inspection and testing records | Request relevant certificates, proof-test records where required, inspection intervals, and acceptance criteria. | Verify that records identify the exact item and were completed by a competent or qualified person as required locally. | Documentation helps establish that the equipment was examined and tested using a controlled process. | A certificate has no item identification, date, test method, result, or authorized sign-off. |
| 9 | Plan for inspection, storage, and maintenance | Confirm cleaning instructions, storage conditions, lubrication requirements, service limits, and discard criteria. | Choose equipment that can be inspected easily and stored away from moisture, sharp edges, heat, and contamination. | Correct care reduces corrosion, deformation, cuts, contamination, and other forms of deterioration. | No user manual, inspection guidance, replacement parts, or withdrawal-from-service criteria is available. |
| 10 | Confirm usability and operator training | Check that the equipment suits the load shape, lifting points, frequency of use, visibility, and workers’ training level. | Review the instructions, warning labels, handling requirements, and need for a lift plan or competent person. | Even correctly rated equipment can fail when installed, operated, or inspected incorrectly. | The product is difficult to identify, adjust, secure, or use without bypassing safety instructions. |
Important: Always follow the equipment manufacturer’s instructions and the lifting regulations and standards applicable in the country and workplace where the equipment will be used.
Choose the Right Gear Type, Size, and Material
Choosing lifting gear starts with the load, not the catalogue picture. Identify the gear type first: wire rope slings suit abrasion resistance, while synthetic web slings protect painted or delicate surfaces. Chain slings tolerate heat and sharp edges better, but they add weight. Check the working load limit (WLL), lifting angles, hitch method, and available headroom. A sling rated for 2 tonnes may lift less at a narrow angle. Size must match the load’s weight, shape, balance, and lifting points. Measure the load instead of relying on old paperwork. It is an easy mistake.
Material selection depends on the working environment. Polyester can perform well around many common chemicals, while some acids and alkalis can weaken it quickly. Steel components need protection from corrosion, especially near saltwater.
For every purchase, request traceability, inspection records, WLL markings, and conformity documentation. Standards such as ASME B30.9 and EN 1492-1 provide useful technical references, but they do not replace a competent inspection.
The risk deserves attention. The U.S. Bureau of Labor Statistics reported 1,069 fatal work injuries among construction and extraction occupations in 2023. The International Labour Organization’s 2023 estimates also linked nearly 3 million deaths annually to work-related causes worldwide. These figures are not limited to lifting incidents, but they show why selection cannot depend only on price.
Many teams still choose the cheapest option. That shortcut feels efficient. It may become expensive after one overlooked cut, overload, or wrong-size fitting. Check the actual application again before ordering.
Inspect Product Quality, Certification, and Manufacturer Reliability
When buying lifting gear, inspect the product before trusting its label. In site inspections, I have seen new-looking slings with damaged stitching and unreadable markings. Check the working load limit, material, dimensions, stitching, hooks, latches, and safety catches. Look for cuts, deformation, corrosion, sharp edges, and uneven finishes. Measure the gear against the seller’s specifications. Small differences can signal poor control.
Ask for a valid certificate, not a decorative document. Confirm the product description, serial number, test date, rated capacity, and inspection authority. Ensure the certificate matches the actual gear in your hands. Check whether testing followed recognized industry requirements and whether records remain traceable. Do not accept copied files with missing signatures or vague laboratory details. Certification alone is not proof of safe use. It must connect to identification, inspection, and proper handling instructions.
Investigate the manufacturer’s reliability before purchasing. Review technical manuals, quality procedures, warranty terms, recall history, and response times. A dependable manufacturer explains limitations clearly and provides replacement parts. Ask how materials are tested and how production defects are controlled. Independent inspection can add confidence, especially for frequent lifting work. Keep purchase records and schedule routine checks after delivery. I once relied too heavily on paperwork and overlooked storage damage. That mistake changed my inspection routine. Practical evidence still matters.
Compare Costs, Maintenance Needs, and Long-Term Value
The cheapest lifting gear rarely has the lowest ownership cost. Compare the purchase price with rated capacity, duty cycle, safety margin, and expected operating hours. A light-duty hoist may suit occasional work but fail financially under daily loads. Ask whether load testing, installation, delivery, and training are included. Measure twice.
Maintenance costs deserve equal attention. Examine access to brakes, chains, wire ropes, hooks, controls, and inspection points. Clear service intervals make budgeting easier.
Check the price and availability of approved replacement parts before purchasing. Corrosion-resistant finishes can reduce repairs in damp workshops, but they cannot replace cleaning and inspections. Keep records.
From field experience, downtime often costs more than routine servicing. Compare warranty coverage, technical documentation, repair response, and expected service life. A strong inspection history supports reliable decisions and helps identify wear before failure. Look for readable capacity markings and traceable test certificates. Do not judge value by appearance alone. That assumption fails.
Long-term value also depends on operator training and correct storage. An underrated accessory can create repeated delays, while an oversized system may waste energy and floor space. Review actual loads, lifting frequency, travel distance, and environmental conditions with a qualified lifting professional.
I once underestimated maintenance access on a compact unit; servicing became slower than planned. That mistake changed how I compare equipment. A slightly higher initial cost can be sensible when it reduces stoppages, replacement frequency, and uncertainty over several years.
Related Posts
-
Top Lifting Gear Trends for 2025 You Need to Know About Now
-

How to Choose the Right Lifting Gear for Your Needs?
-
Top 10 Hoist Lift Manufacturers for Global Buyers
-
Why Industrial Lifting Equipment is Essential for Modern Industries?
-
What is the Best Lifting Tools for Your Needs and How to Choose Them
-

How to Choose the Right Lifting Gear for Your Needs?

